How To Dismantle A Laptop
Laptops are very useful and easy to use. They are portable, so you have complete flexibility while you work. You can work anytime from anywhere. You don’t have to sit in the same place for hours. After prolonged use of laptops, they may need some service or repair for some problems. Some problems occurring on laptops can be solved only by professionals, but there are some problems that an average laptop user can solve. Some problems necessitate disassembling the laptop. Most users do not know how to disassemble and assemble a laptop; in this article, you will learn how to disassemble and assemble your laptop on your own.
How To Disassemble and Assemble A Laptop
Laptop assembly and disassembly is a straightforward process that requires only the right tools and a few basic steps. You need a screwdriver that fits perfectly into the screw. There are different sizes of screws in a laptop, so make sure you have the perfect size of screwdriver for them. You also need rubber gloves and a knife in some cases. The first question that comes after getting all the tools is how to dismantle a laptop. The answer to this question may change for different brands of laptops.
Different brands may have different elements, and the location of these elements may also differ. To avoid any confusion at the time of assembly, there are a few things you can do. Try to write down which component goes where or click pictures. This will come in handy while assembling them. Also, to avoid confusion with the screws, tape down each screw with the respective component or on paper under the component’s name.
How To Dismantle A Laptop
Now with all the tools and preparation, you are ready to proceed further. If it’s your first time and you don’t know how to open a laptop, just follow the steps given below. Make sure you follow each step carefully, or else you can damage your laptop.
1. Remove Battery And Power Supply If Detachable via Lock
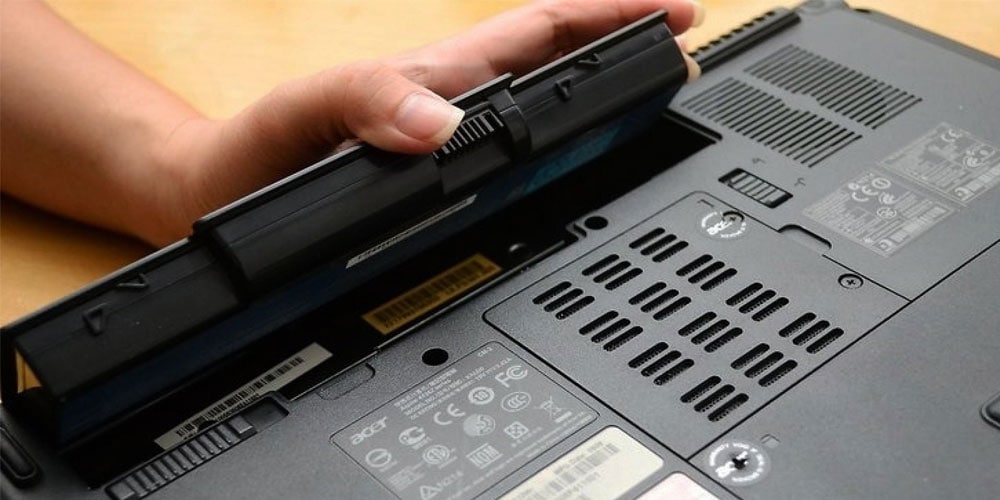
Disconnect the power source to your laptop and then remove the battery as the first and most critical step before disassembling it. There will be voltage flowing through the circuit if the battery or power supply is not removed. Even if you simply touch the motherboard with metal or a small screw falls, your motherboard will be damaged in such instances. You won’t be able to fix it. Therefore, even while you are removing the connection between the battery and the motherboard, never use a metal object. Instead, use plastic to avoid short circuits on the pins that connect the battery to the motherboard.
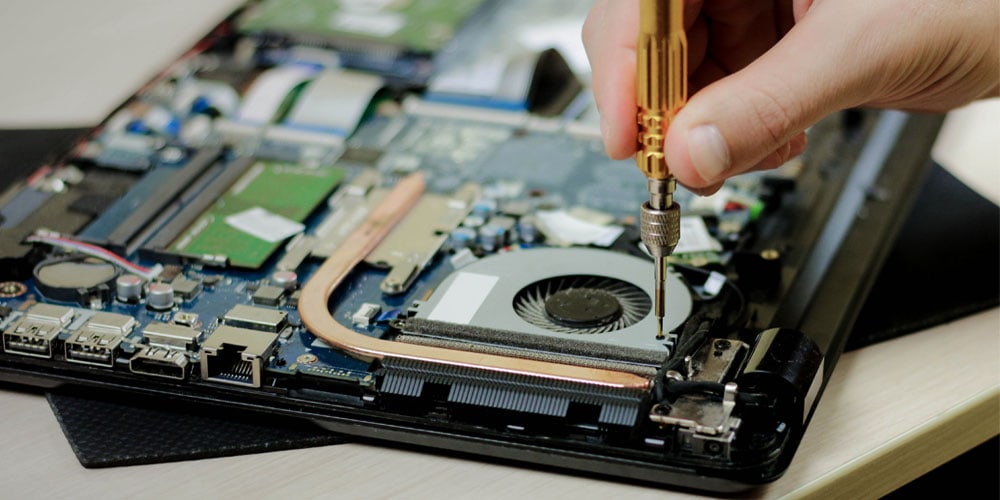
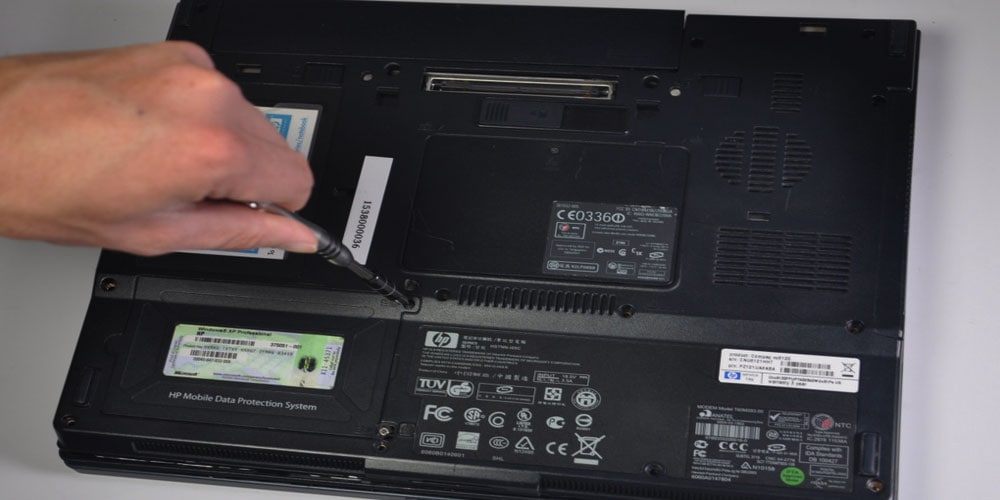
2. Remove The Components Of The Laptop
- Begin gently removing the screws with the help of a Philips screwdriver.
- Some screws may not come out right away. In this case, consider using magnetic screwdrivers or turning your laptop and carefully tapping on the screw’s other side.
- If the screw’s threads have worn out, attempt drilling the screw out with a Dremel tool.
- After that, begin removing coverings such as the Hard Drive cover, RAM cover, and others.
- Remove all the screws from all the covers used for the components of the laptop. The amount of cover may differ according to the brand of the laptop.
- To avoid any confusion when assembling your laptop, keep the screws in the holes on the cover itself and tape them up.
- Now remove the CD/DVD drive; it is similarly held in place by a single screw. This screw is sometimes hidden beneath a cover. To figure out where the screw will go, visualize the size and length of a CD/DVD drive. Remove it as well.
- Remove the covers from the laptop and arrange them out on a clean area of your desk in rough relation to each other as they were on the laptop.
After removing the covers, start removing the components inside.
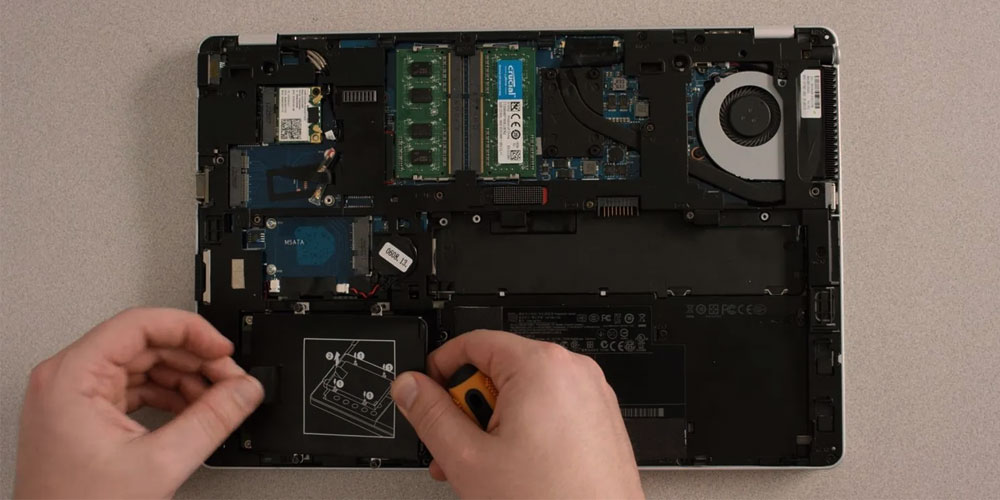
- To remove the Hard Drive, just apply a little force in the opposite direction of the data pins through which it is connected.
- Screws may be or may not present there; if there are, just remove them as well.
- Now keep the Hard Drive and the Hard Drive cover together to avoid confusion while assembling.
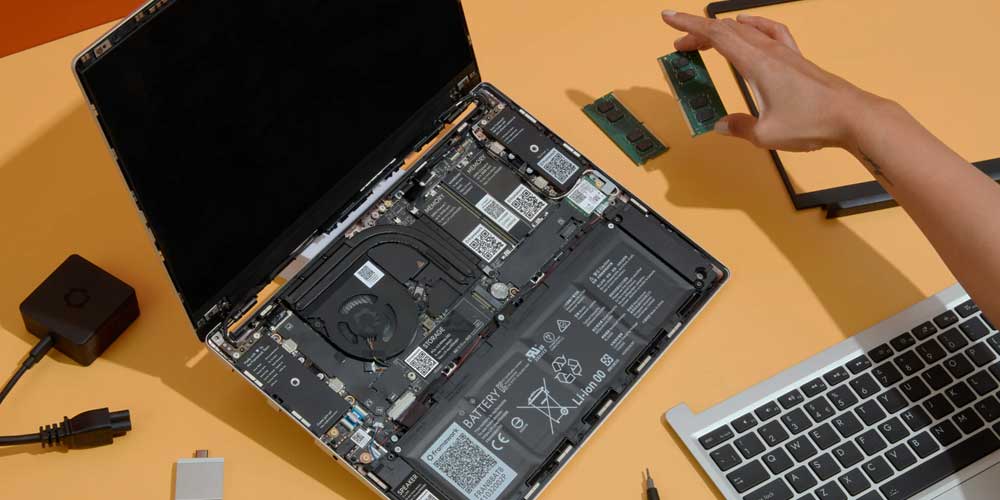
- The RAM stick is attached to the motherboard with clips. To avoid the release of any static energy, use a plastic spudger tool. Undo the clips and remove the RAM and keep it along with its cover. Remember that the RAM is removed at a 30-degree angle.
- There is a little gold-tipped cover that can be prised off with little effort. These are the antennas for wireless communication. The wireless card can be taken out in the same way as the RAM sticks. It’s important to remember to remove it at an angle of 30 degrees.
- For the time being, if you see a heat sink under a cover, leave it there. You risk damaging the CPU if you remove it.
3. Remove Hinge Cover Plate And Keyboard
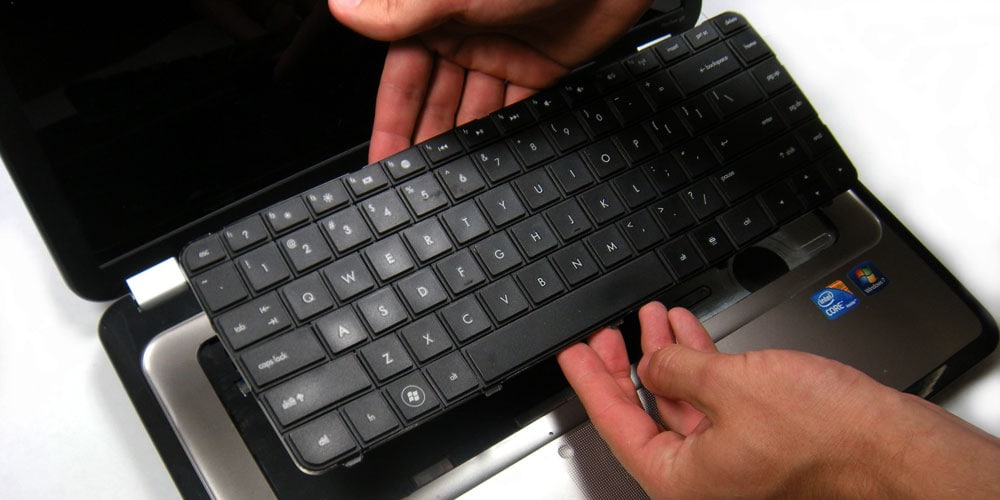
Now the next step is to remove the Hinge Cover Plate and keyboard. The Hinge Cover Plate (HCP) is attached using some screws (on some laptops, screws are not used). A little picture of a keyboard is used to represent this. These screws are sometimes found within the battery compartment after it has been removed. Make sure you make a note of which seats belong to which compartment. There may be a visible notch where you can start removing the hinge plate cover. Pry it open with a tiny flathead screwdriver. Not much force is required to open it.
Check for other screws if you feel that it requires more force. Remove the whole part using your fingers once the hinge cover plate is prised up. After this, check for extra screws near the keyboard. Taking out the keyboard is not as easy as removing the hinge cover plate. The keyboard needs to be pushed forward in the direction of the screen before lifting it. Be very careful at this point because there is a small ribbon connected underneath the keyboard. A plastic hinge is used to keep the ribbon cable in place. Using a spudger tool or your fingers, you can lift this ribbon cable.
Now, remove all the cables you see under the keyboard. Use a plastic object to do so. One thing you can do here is to take a picture of the cable connection or draw a diagram. This will help you to remember the connections while assembling the laptop. Only a few brands of laptops provide ribbon cables. Others have small plastic plugs. While the ribbon cables need to be prised forward or upward, you just have to give a small pull to these small plastic plugs.
4. Dismantle The Display Unit
Now comes the display unit of the laptop. Before removing it, you must remove the antennae cable and the LCD data cable. The removal of these cables is very simple, and they may be connected in various ways. According to your brand, these cables are connected. To remove the display assembly, you must first remove the hinge screws. These screws are typically longer; simply try to determine where these screws are connected. They are either on the backside or inside. Once these screws and cables are removed, gently remove the display unit too.
After this, from the edges of the screen, remove the black rubber pads. The screws that hold the screen together are found here. Use your fingers to remove the black rubber pads and avoid damaging them using too much force. To prevent damage to the rubber pad, avoid using any tools to remove it. Keep these screws separately after removing them.
The screen has a front cover which you can remove using a spudger tool or with your finger. If necessary, run the spudger tool around the outside. Make sure you don’t feel any resistance while doing this, and if you do, look for any remaining screws and remove them. Now the LCD screen is exposed after the removal of the front cover. On the backside of the LCD screen, there will be a warning “DO NOT TOUCH.” Without touching this side, after removing the screws on the side, take out the LCD screen.
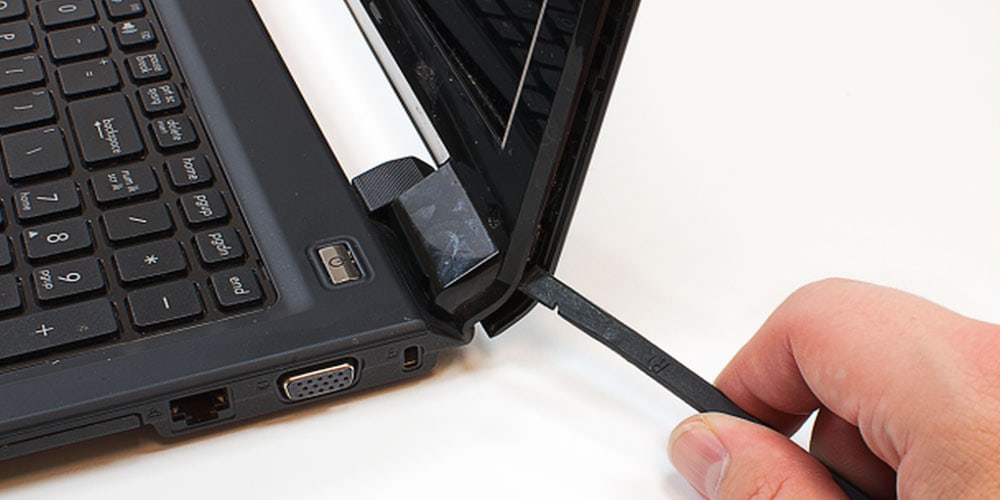
5. Remove The Case Screws And The Case From The Laptop
After removing the screen:
- Look for the other screws that are left and take them out using the screwdriver.
- While doing so, keep the screw separated from other screws and label them accordingly. This will help you when you assemble your laptop again.
- After the removal of all the case screws, pry out the case from the laptop using a spudger, file nails, or a plastic tool.
Notice that if you feel any resistance while doing so, check if there is any screw left for removal and remove it.
6. Remove The Motherboard And Its Components
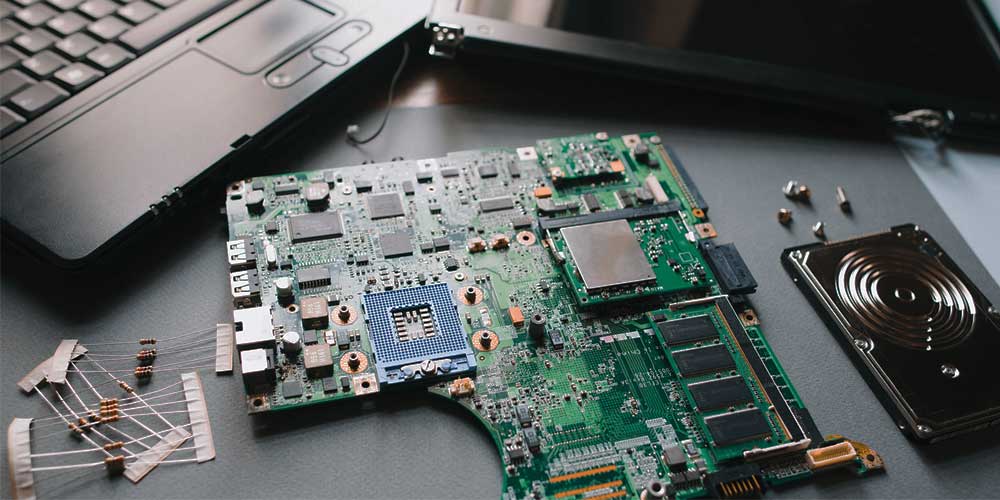
After disassembling your laptop, you will notice that the touchpad is not separate. It is a part of the assembly. So, if you want to replace one of either touchpad or assembly, both will be replaced as they come in assembly. The motherboard is the final step in the removal process. The power board, video board, etc., are secured into the system using screws. Remove all the retaining screws. After that, carefully unplug all of the cables that are connected to the motherboard.
The screws on the motherboard are marked with numbers or white arrows sometimes. These screws are the ones you need to take out to remove the motherboard from the laptop. You do not need to remove all the screws. Take note of the screw number as it appeared on the motherboard. After this, slowly pull out the motherboard. You should not pull it by force. While pulling, try to feel if there is any pressure that is not allowing the motherboard to come out. This could be due to a screw that you overlooked. After that, your motherboard should quickly come out of your laptop.
How To Assemble A Laptop
Now, after disassembling and fixing the problem, you need to assemble the laptop again. If you don’t know how to assemble a laptop, do not worry, we got you covered. The laptop assembly process will be much easier, and is the steps will be the exact reverse of what you did till now. Here all the separation of screws will play an important role. The steps for assembling the laptop is:
STEP 1
- Reinstall the motherboard and reconnect the sound cable in the casing.
- Reinstall all of the screws in the white arrow holes.
- Reassemble the case’s components. Remember to thread the cables back through, including the antennae cable. Make sure there are no snags or tangles in the cable.
STEP 2
- Reinstall the holding screws in the laptop’s bottom half. Then reattach the top screws.
STEP 3
- Reinstall the screen and reconnect the antennas and data cable.
- The display hinge screws must be replaced.
STEP 4
- Replace the keyboard. To begin, reconnect the ribbon cable. Remember that the ribbon is held in place by a plastic hinge; remember to lift this up first (gently).
- There are two sides to the ribbon: one that is darker and one that is lighter. There is no twist in the ribbon because the lighter side should face upward.
- Replace the holding screws on the keyboard.
STEP 5
- Replace the Hinge Cover Plate (HCP) in its original position. Apply uniform pressure to achieve the perfect fit.
STEP 6
- Replace the RAM. It’s important to remember that it’s fed into the slots at a 30-degree slant, not straight on.
- Click it downwards into place once it’s been fed at a 30-degree angle.
- Replace the remaining components, including the wireless card, which must be inserted at a 30-degree angle. Replace the gold connection gently after clicking it into place.
- Slid the Hard Disk Drive (HDD) in the opposite direction of the arrow to replace it. Make sure it’s not too tight or too loose.
- Replace the retaining screw in the laptop’s underside and insert the CD/DVD drive.
STEP 7
- Finally, replace all of the screws and the component covers.
Now your laptop is completely assembled.
Check some of the laptops we have reviewed:
- Best Laptops For Engineering Students In India
- Best Gaming Laptops Under 35000 In India
- Best Laptops Under 1 Lakh In India
Conclusion
You can easily dismantle your laptop with the help of this article, even if you already know how to dismantle a laptop. Just make sure you follow the steps carefully. While disassembling, make sure you separate the screws accordingly to make your task easier when you want to assemble your laptop. The assembling process is way easier than disassembling. Make sure you follow all the steps carefully, or your laptop will not start after it is assembled.