How to Take A Screenshot on Asus Laptop
Many of us are used to “copy-pasting” stuff when using a laptop. But, you can’t always copy and paste items from one place to other. If any program or data does not allow you to copy, copy and paste will not work. A screenshot is essentially like clicking a picture of the items or data shown on the screen. The screenshot is taken in the form of a picture that you can store on your computer. Taking a screenshot is very handy since it is very quick to do so, and you can capture anything displayed on your computer screen.
Methods on How to Screenshot on Asus Laptop
Whether you own as Asus laptop that cost close to a lakh or an Asus budget gaming laptop, if you do not know how to take screenshots on your laptop, you can follow the method given in this article. There are several methods using which you can take screenshot on a laptop, and we will cover each of those methods.
1. Using PrtScr to take Screenshot on an Asus Laptop
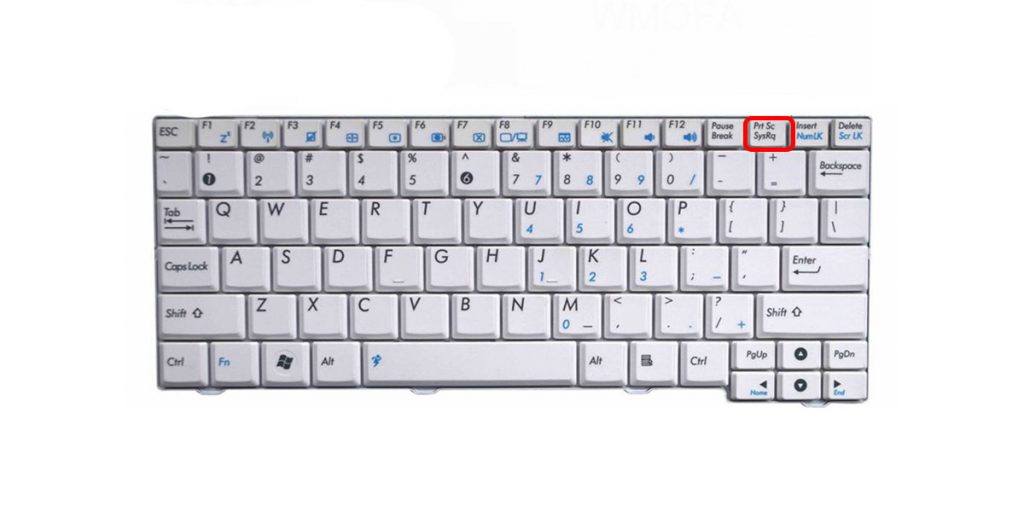
On any Asus laptop, you will have a key labeled “PrtScr” on the top of the keyboard’s rows. You can use this function to take screenshots on your laptop by following the given steps.
- Open up the page you want to take a screenshot of.
- Press the “PrtScr” button on your keyboard once, which will capture the screen.
- You will not see anything happen, but don’t worry; the captured shot is “copied,” and as a next step, you will have to “paste” it.
- Open up any application like Paint or Word or any image editing tool.
- Paste the screenshot by pressing Ctrl + V on your keyboard.
- If you want to save the taken screenshot, you have to open it in Paint. If you just want to paste it somewhere on a Presentation or a document, you can stop at the Paste step.
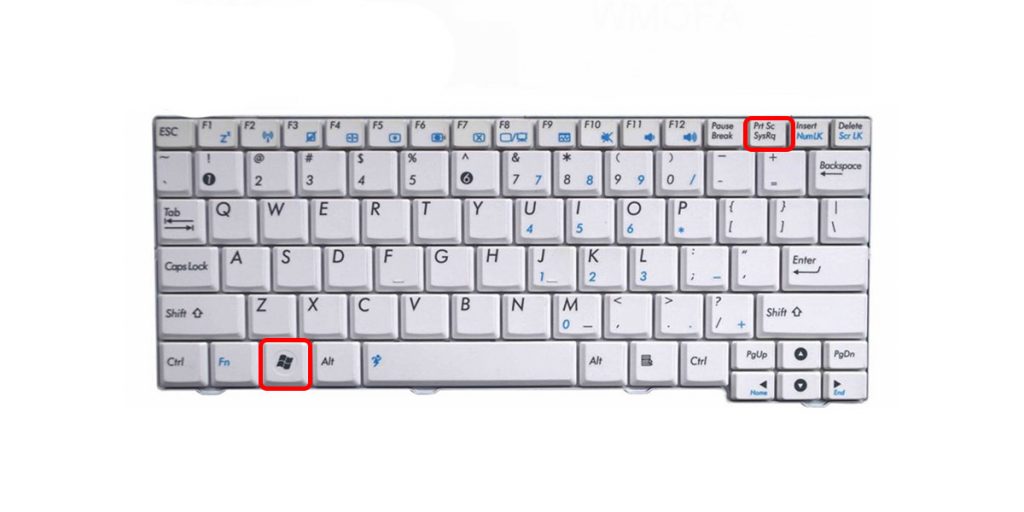
2. Using Windows + PrtScr to take a screenshot on an Asus Laptop
This is very similar to the above method, which involves the same basic function and key. The only difference here is between what happens to your screenshot.
In the earlier method, the screenshot you took will be “coped,” and you have to “paste” it to see the screenshot you took.
With Windows + PrtScr, you directly save the screenshot you have taken. Follow the steps given to take screenshots using Windows + PrtScr.
- Open up the page you want to take a screenshot of.
- Press the “Windows” button on your keyboard, followed by the “PrtScr” button once, which will capture the screen. This will be indicted with a slight blinking effect.
- Your screenshot is saved in the folder labeled “Screenshots” in the Pictures. You can navigate here by My PC/This PC > Pictures > Screenshots.
3. Using Windows + Alt + PrtSc to take a Screenshot on an Asus Laptop
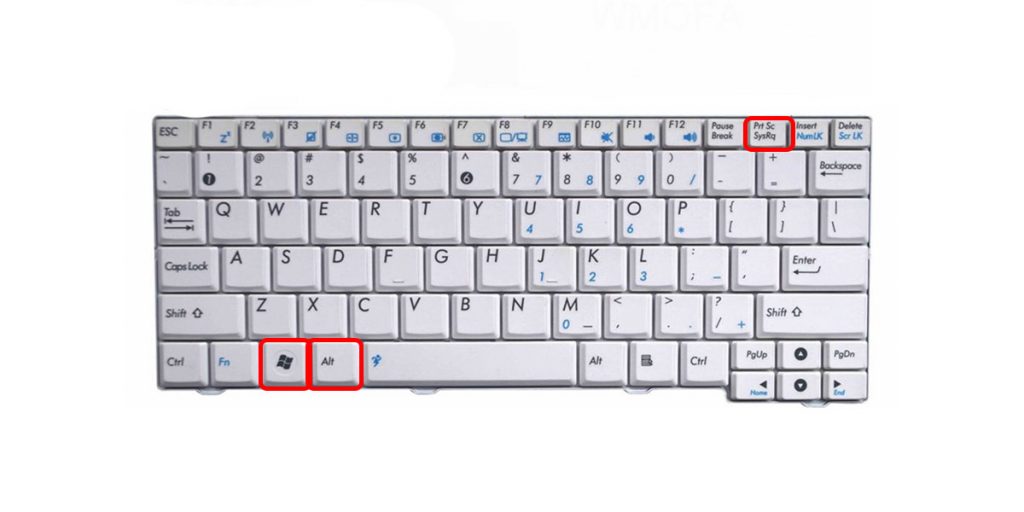
With Windows + Alt+ PrtScr, you directly save the screenshot you took and share it with your friends via email, Xbox Game Bar, or any other sharing application. When you have taken the screenshot, a pop-up will come on the right side of the screen, asking for sharing of the screenshot.
Follow the steps to take a screenshot using Windows + Alt + PrtScr.
- Open up the page or put the screenshot on the screen you want to take.
- On your keyboard, press the “Windows” button followed by the “Alt” and “PrtScr” buttons once, which will capture the screen. This will be indicted with a slight blinking effect.
- Your screenshot is saved in the folder labeled “Screenshots” in the Pictures. You will also get a pop-up asking you to share the take screenshot.
4. Using the Snipping Tool to take a Screenshot on an Asus Laptop

The Snipping tool is present by default on any Windows computer, and it is a handy program that lets you edit and play around with the screenshot you capture.
In earlier methods, you would capture the whole screen. If you want to capture a specific part of a screen, you have to use a tool like the Snipping Tool.
It is quite easy to use this tool. Follow these given steps to take a screenshot using Snipping Tool.
- Go to Start and search for Snipping Tool and open it.
- A small window will open up. Click on New, and the screen will freeze with decreased brightness.
- You can select any portion of the screen with the marker tool.
- You can edit the taken screenshot in the window with the numerous tools and then save it.
5. Using Win + Shift + S to take a Screenshot on an Asus Laptop
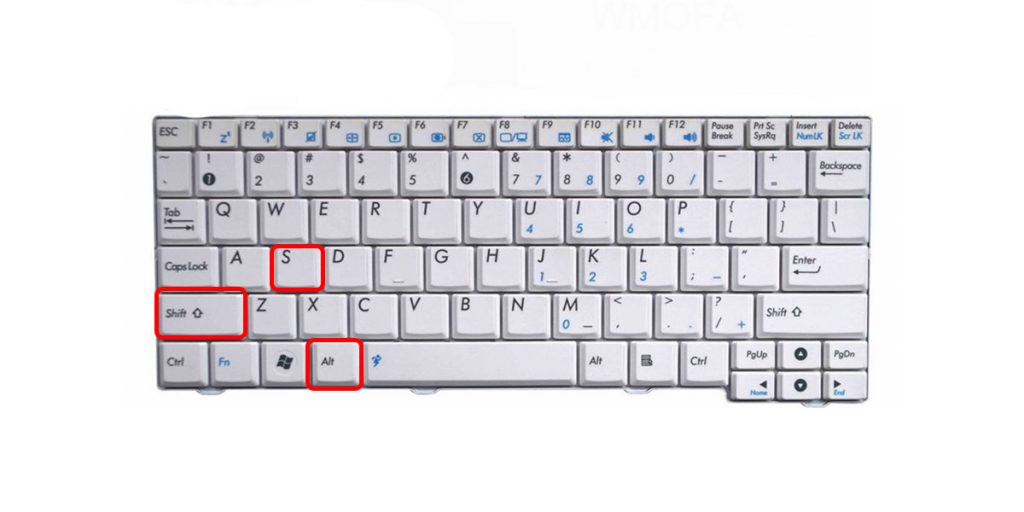
This is the alternative and the quickest way to take a screenshot, similarly to the earlier method. To take screenshot on an Asus laptop this way, follow these steps.
- Open up the page you want to take a screenshot of.
- Press the “Windows” button and then the “Shift” and “S” buttons.
- This will dim and also freeze the screen. You can use the marker tool to select any portion of the screen.
- Once you are done, the taken screenshot will be saved on the clipboard. You can save it on Word, Paint, or Photoshop to edit it or save it as it is.
- To save it, open up the Snipping Tool from Start, where you will see the screenshot taken. You can edit the screenshot here or save it by clicking “Shift” + S.
This is the easiest and the best method to take a screenshot.
6. Using Third-Party Tools to Take a Screenshot

There are several third-party tools you can use to take screenshots, but we can’t list every one of them here. Some of the popular third-party tools and browser extensions are :
- Lightshot
- GoFullPage
- FireShot
- Nimbus Screenshot & Video Recorder
- HTML Element Screenshot
Not only these, but there are also many others, and many of them have their advantage and special features. Also, extensions aren’t limited to Chrome browsers only. These extensions/plugins can be easily installed in other browsers like Firefox or Edge.
As mentioned earlier, some of these extensions/plugins have additional functionality compared to traditional screenshot methods like the ability to edit screenshots, cloud uploads, copy to clipboard, search for similar screenshots, etc.
Other Shortcut Keys You Can Use On Your Asus
Screenshot shortcuts aren’t the only things you can use to make your life easier. There are some other acronyms that everyone should know if they have an ASUS laptop.
1. Fn + F12 = MyASUS
MyASUS is the most convenient key combination for ASUS laptops. Here you can assign all the different keyboard keys as you like, so you can easily start a command by combining F5 and F6 with different keys. Therefore, this is probably the most important key combination on ASUS laptops.
2. Fn + F2 = Airplane mode
For some reason, the Macbook doesn’t have a keyboard shortcut to enter airplane mode. However, on ASUS laptops and many common Windows laptops, you can switch to airplane mode by simply pressing Fn + F2.
3. Fn + F8 = Display Mode
This key combination is useful if your device uses multiple different displays. This allows you to switch between screens, which is one of the most useful buttons on your ASUS laptop.
Conclusion
Now that we have showed you how to take a screenshot on a Asus laptop, use any of the above methods to take a screenshot. Taking a screenshot is very versatile and extremely useful. If you own an Asus laptop, we hope you know all the different methods you can use to take screenshots on your laptops.
With with new Windows update, taking screenshots becomes easier, and Asus has the handy key of “PrtScr,” making it easier to take screenshots. If you want quick and simple screenshots, using the simple PrtScr button is more than enough and super quick, but if you want some advanced functions like editing, etc., you can use Snipping Tool or any third-party tools.