How To Use Refilled Ink Cartridge In HP Printer
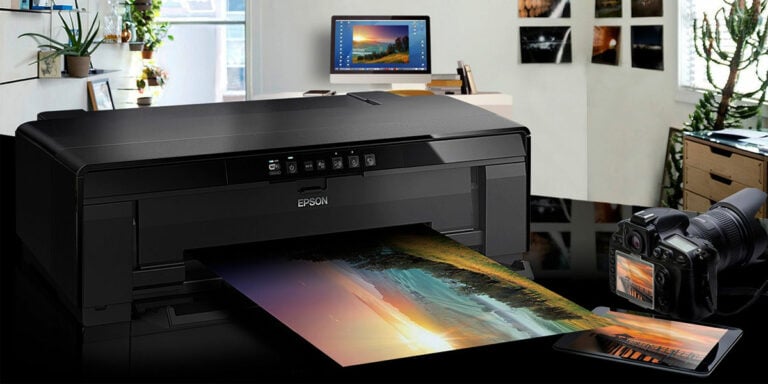
Printers are helpful output devices that we can use for our personal, professional, and educational purposes. When it comes to printing devices, HP printers are one of the best brands and sell printer in all price ranges including printers costing under ₹5000. Most people use laser printers or inkjet printers. Inkjet printers use ink cartridges to store the ink used for printing. Once the ink level in the cartridges is low, you can either refill them or replace them. Replacing the old ink cartridges is more costly. That’s why most people opt for refilling the ink cartridges. If you do not know how to refill and use the same old ink cartridges, then this article will help you.
How To Use Refilled Cartridges In HP Printer?
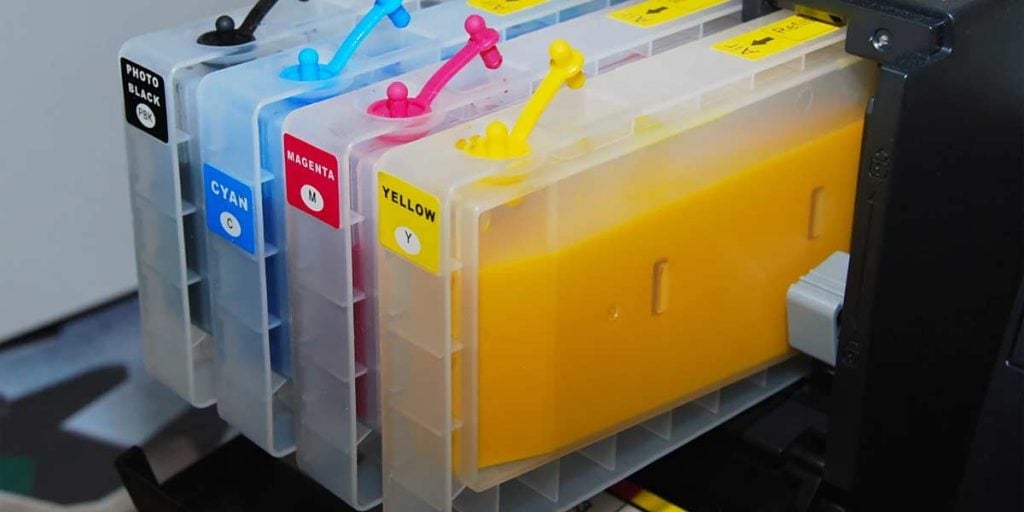
The first step before reusing the old ink cartridges is to refill them. It is very straightforward to refill the ink cartridges. You need a refill kit that includes Bottle(s) of ink, Injection Needles, Syringe, Plastic Gloves. The ink required to refill is directly proportional to the ink cartridges to be refilled.
1. How To Refill An HP Ink Cartridge
Generally, the same steps are followed to refill the HP 60 cartridge series. This series also includes the HP 61, 62, 63, and 65.
The steps to refilling the cartridges are:
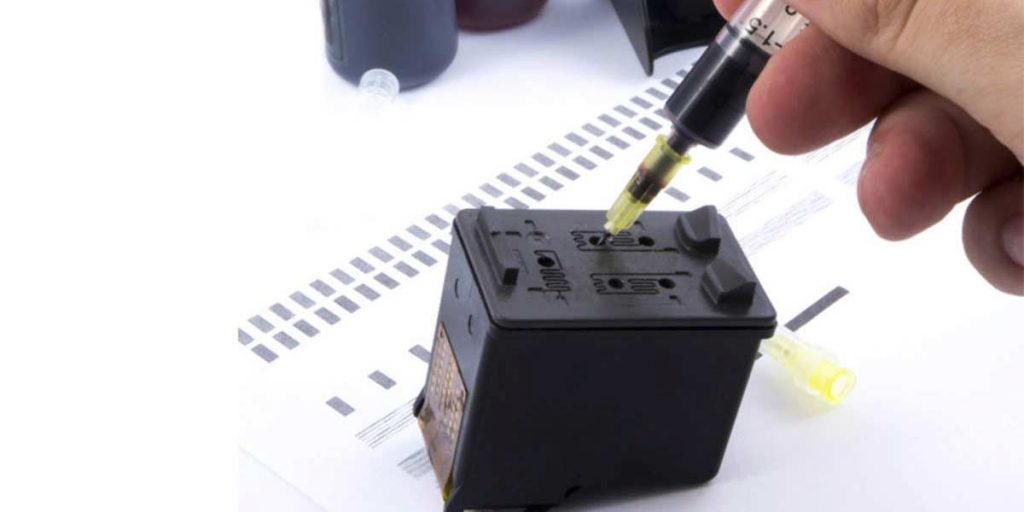
Step 1. Remove the top cover along with the front sticker level. This reveals five holes that can be used to refill the container.
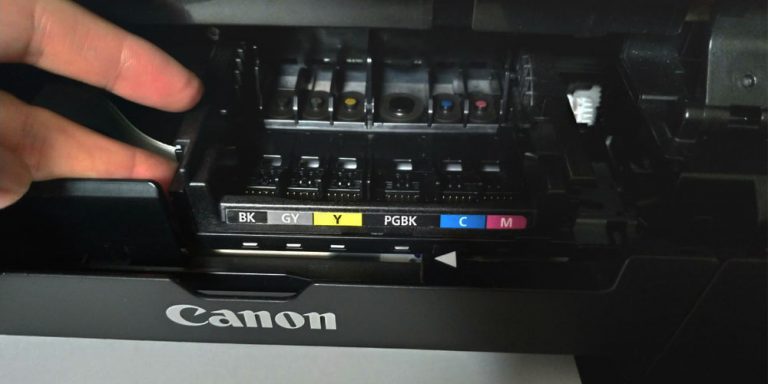
Step 2. In a tricolor cartridge, there are three chambers. It is very important to know which hole enables you to fill them when refilling the tricolor ink cartridges. (If you don’t know this information, you can fill the holes with different colors.)
Step 3. Insert the syringe and poke it through the sponge and pull out the syringe again. The needle should then be wiped away with a cloth or paper. This allows you to determine which hole belongs to the cyan, magenta, or yellow color.
Step 4. Now, while refilling, make sure you close the other holes using tape. This will prevent contamination of other holes if you accidentally spill the color. Use the top hole and cover the rest with tape when refilling the black cartridges.
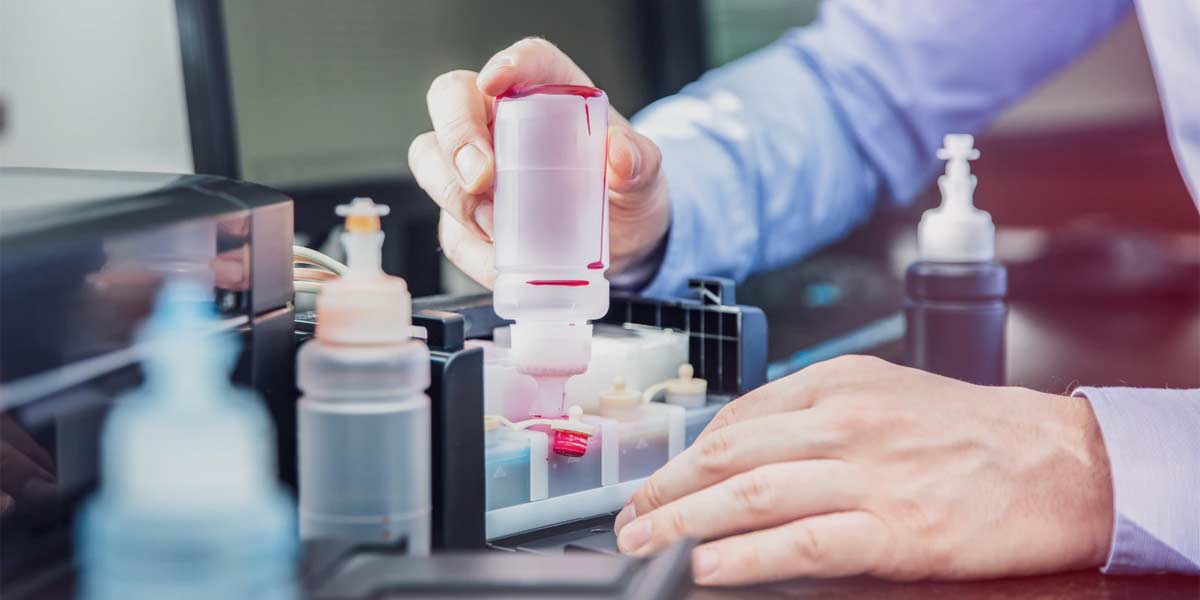
Step 5. From the ink refill bottle, fill up the syringe with the ink.
After this, put the syringe needle through the hole in the cartridge. Now, because of the sponge, you might feel some resistance. Just apply a gentle force, and the needle will pass through the sponge.
Step 6. The amount of ink that you can refill depends on the type of cartridge. For a standard cartridge, it is 4ml, and for a high yield cartridge, it is 12ml. To avoid spilling the ink through the hole, be careful during the process.
Step 7. Pull out the syringe and remove the tapes after injecting the ink. Remove any ink that could have escaped from the hole.
Step 8. Let the cartridge sit for at least half an hour for the sponge to soak in ink thoroughly.
Step 9. Put the cartridge back in the printer. Your HP printer might still think that the cartridge is empty. Just bypass this notification for printing to continue.
2. How To Get HP Printer To Recognize Refilled Cartridges?
After refilling the cartridges, many users have doubts, like “how to get the HP printer to recognize the refilled cartridge?” or “how to use a refilled ink cartridge in an HP printer?” The HP printers have no issues with recognizing the new ink cartridges when installed.
The problem occurs when you want to use a refilled ink cartridge. After inserting an old refilled ink cartridge, the printer displays a series of error notifications with varying messages. Toner not compatible, Printer Cartridges not detected, A low ink level, Cartridges protection enabled, or No cartridges installed are some of the different notifications.
The printer’s job is to reset the printer’s memory. This should be done whenever a new ink cartridge is inserted. And the ink status should be displayed in full. But as printers fail to do so, the notifications mentioned above pop up.
This problem sometimes occurs with new ink cartridges as well. There can be dust particles on the internal part of the printer which come in contact with the cartridges. This could explain why the printer didn’t recognize it.
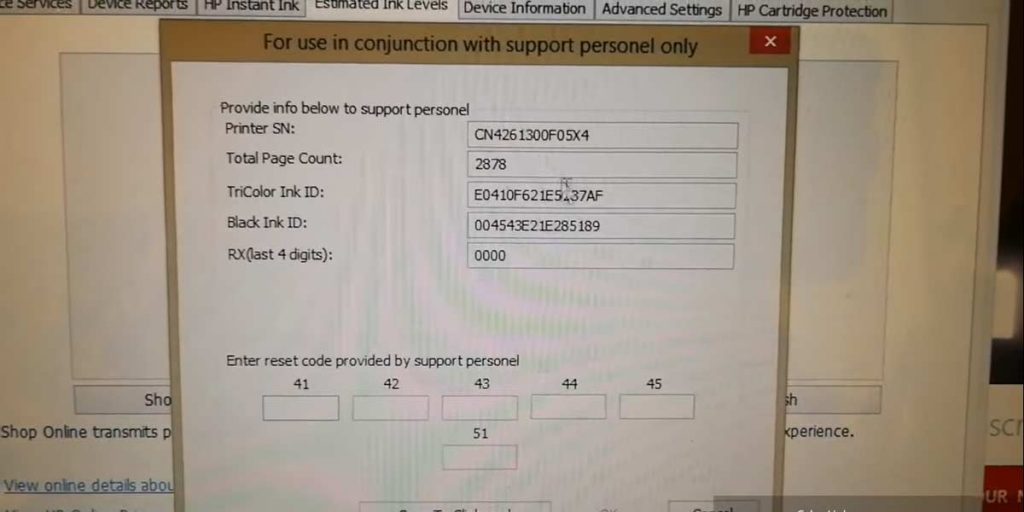
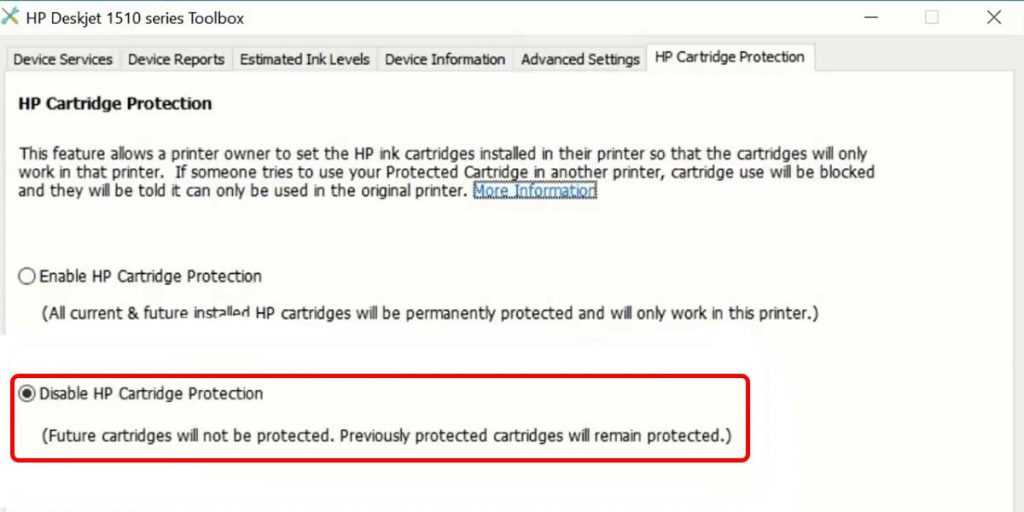
Using a lint-free cloth and distilled water, try cleaning the internal part of the printer. HP has released an option called “Cartridge Protection.” The setting will lock the cartridge, so you won’t be able to use it with another printer.
You have to disable this feature to use the ink cartridge. This issue can also occur because you have not installed the cartridge properly. If your firmware is outdated, find the correct update for it and update it.
Sometimes you order something, and you receive something else, and if the wrong consumable is installed, your printer will not recognize it. To solve this problem, replace the wrong consumable with the correct one.
To resolve all these issues, try the following steps:
Step 1. Restart your HP printer and see if it can recognize the refilled ink cartridges.
Step 2. Check whether the ink level status has been changed from low ink level to full.
Step 3. Manually reset the printer’s internal memory, so it identifies the cartridges which are filled.
Step 4. The new ink cartridges peel off the protective strips so the printer can recognize them.
Step 5. Replace the toner if it is damaged.
Step 6. After cleaning the contact with distilled water, try inserting the cartridges again.
Step 7. Check the firmware and, if necessary, update it.
3. How To Use Non Genuine HP Cartridges?
HP printers have an option known as “Cartridge Protection.” This option for a specific printer locks the ink cartridges. You cannot use them with another printer once they have been locked. You can even use these cartridges with new printers. For example, if you already own an HP OfficeJet Pro 251dw printer and decide to upgrade to an OfficeJet Pro 8600 ink printer.
Now, because of this cartridge’s protection, you won’t be able to use the cartridge used in the OfficeJet Pro 251dw with the OfficeJet Pro 8600 ink printer. That said, because of HP’s cartridge protection, you won’t be able to refill, recycle or rebuild the cartridges for use in another printer.
I. Why And How To Disable HP Cartridge Protection
The fact that such a limited cartridge system is available makes no sense. Some reasons why the HP cartridge protection may be disabled include:
- Refilled or refurbished HP ink cartridges will not be used.
- If they were already loaded into your old printer, you would not be able to utilize the ink cartridges in a new printer.
- It is impossible to recycle your ink cartridge, which means it is waste after it’s empty.
- Some users indicate that the HP cartridge protection setting can function against genuine brand new cartridges and against cartridges that come along with the printer itself.
The better thing about this option is that you can disable it.
To disable the HP’s cartridge protection setting, you have to follow a few simple steps.
Step 1: Go to Printer Settings from the Printer menu.
Step 2: Find the option to disable protection for HP cartridges.
Step 3: Choose the option Disable.
Step 4: If necessary, click Apply and Save.
If your printer can access the internet, then follow these steps.
Step 1: Open a web browser and type your HP printer’s IP address in the search bar.
Note: You can locate the IP address of your printer by navigating to the settings of the printer and then heading to the network setup settings.
Step 2: The Embedded Web server of your printer is accessible. Go to HP cartridge protection & Settings.
Step 3: Choose Disable HP Protection cartridge
Step 4: Click or Save Click
To disable the cartridge protection setting from a Windows PC, follow these steps.
Step1: Select the Printers and Devices in the control panel
Step 2: See your printer in the list and right-click
Step 3: Choose properties and the tab Software
Step 4: Untick “upgrade your printer automatically”
II. How To Use Non-Genuine Cartridges
Now, many printer users have a question about “how to use non-genuine HP ink cartridges?” After disabling the cartridge protection, we can use the cartridges with other printers. This means even if the cartridges are already locked to a printer, we can trick them into using them in another printer. To do so, follow the steps given below:
Step 1. Remove the new ink cardboard and load it back into the printer of the old ink cardboard.
Step 2. Wait 10 minutes before the subsequent step is taken.
Step 3. Remove the old ink cartridge and reinstall the new ink cartridge again.
This will make your printer recognize the new ink cartridges. If this method doesn’t work, try using the steps given below:
Step 1. Remove from the printer a fresh ink cartridge.
Step 2. Switch off your HP printer and unplug its power line for 10 minutes.
Step 3. Reconnect the power cable, but do not yet press the power button.
Step 4. Insert the new ink cartridge back into the printer.
Despite giving you the steps, we would recommend not to use non genuine ink as it can damage your printer forcing you to buy a new printer.
Conclusion
Refilling the cartridges is a straightforward process. You have to follow the steps given for it. Many printers have the “cartridge protection” option, allowing us to use a refilled or recycled cartridge. You can disable this setting in the different ways mentioned above. Choose the method that suits you best. After disabling this option, you can also use non-genuine ink cartridges.